

TL;DR
An app QA checklist is a structured set of tests and verifications you run before submitting your app to the App Store. It covers functionality, performance, security, usability, and compliance. Nearly 25% of App Store submissions get rejected for preventable issues, so skipping QA is the fastest way to waste weeks in a rejection loop. This guide gives you every check that matters for iOS in 2026, with extra attention to AI-built apps and solo builder mistakes.
Building an app is hard. Getting it approved shouldn’t be the part that breaks you.
Yet according to Apple’s App Store Transparency Report, roughly 1.9 million out of 7.7 million submissions were rejected. That’s about one in four. The majority failed for reasons that a simple checklist could have caught: performance problems, metadata errors, missing privacy declarations.
If you’re shipping your first iPhone app, a QA checklist is the thing standing between “approved in 24 hours” and “stuck in a two-week rejection loop wondering what went wrong.”
This guide walks through what an app QA checklist actually is, what it should contain for iOS in 2026, and where first-time builders consistently trip up.
See how x1 handles the build-to-launch workflow so fewer QA problems surface in the first place.
An app QA checklist is a step-by-step list of tests that verifies an iOS app is ready for App Store submission. A complete checklist should include:
- Functional testing
- UI and UX validation
- Performance testing
- Security checks
- Network testing
- Accessibility testing
- Device compatibility testing
- App Store compliance review
- Privacy declarations
- Metadata verification
Running a complete QA checklist before submission reduces App Store rejection risk, improves user experience, and helps developers catch bugs before launch.
What Is an App QA Checklist?
An app QA checklist is a structured list of tests, validations, and verifications that confirm your app works correctly, performs well, and meets store requirements before you hit “Submit for Review.”
Think of it as a preflight inspection. Pilots don’t skip it because they’re confident the plane probably works. You shouldn’t skip it because the app looked fine on your phone.
A few clarifications worth making early:
QA is not the same as testing. Quality assurance is the broader discipline of preventing defects through process. Testing is one activity within QA. A proper app QA checklist covers both, including process checks like “did you provide demo credentials for the reviewer?” alongside technical checks like “does the app crash on iOS 17?”
A checklist is not a test plan. Test plans describe strategy, scope, resources, and timelines. A checklist is the concrete, scannable list of things to verify. For solo builders and small teams, the checklist is often all you need.
If you’re new to iOS terminology like SwiftUI, Xcode, or HIG, the native iOS glossary covers those terms.
Why Every App Builder Needs a QA Checklist
The numbers tell a clear story.
Rejection is common. Performance issues alone caused more than 1.2 million rejections in Apple’s transparency data. Nearly 40% of iOS submissions face delays or rejection due to preventable errors.
Users are unforgiving. Almost half of all apps get uninstalled within 30 days. Research shows that 66% of people abandon an app with poor UX, and 29% immediately switch to a competitor. A single crash doesn’t just generate a bug report. It generates a permanent loss of that user.
The cost compounds. Every rejection cycle adds days to weeks of delay. For a solo founder trying to validate an idea, that’s not just lost time. It’s lost momentum, lost revenue, and sometimes a lost window of opportunity.
The best way to avoid all of this? A structured workflow that addresses quality during the build, not just after it. If you’re exploring how to go from idea to a real app, understanding where QA fits in the process is essential.
What an App QA Checklist Covers
Here are the core categories every iOS app QA checklist should include. These aren’t optional sections to pick from. Each one addresses a different failure mode that Apple reviewers, real users, or both will catch.
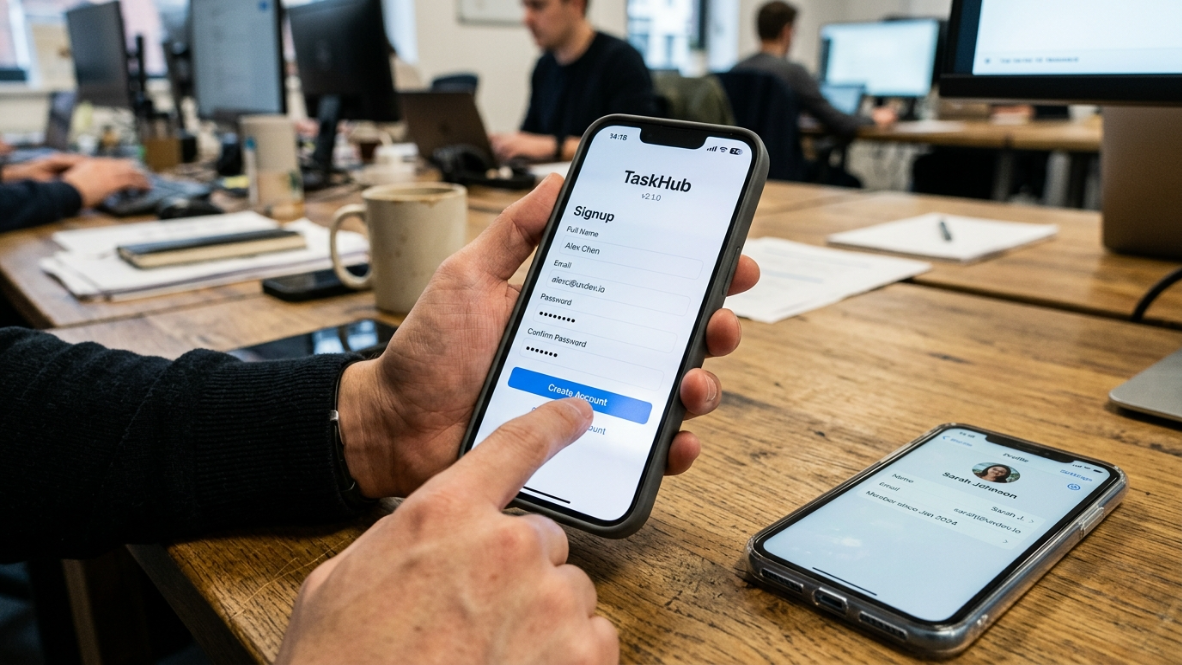
Functional Testing
This is the foundation. Does the app actually do what it’s supposed to do?
☐ Validate login and logout flows with valid and invalid credentials
☐ Verify all core user flows end-to-end (sign-up, main feature, payment, confirmation)
☐ Test in-app transactions like purchases and form submissions
☐ Simulate real-world interruptions: incoming calls, notifications, multitasking
☐ Check “nothing states” and empty states (what does the app show on first open with no data?)
☐ Confirm deep links and push notifications route to the correct screens
☐ Test error handling for invalid inputs, timeouts, and server failures
That empty state check is one practitioners consistently flag. One commenter in the r/iOSProgramming subreddit noted that Apple reviewers are humans under pressure, and if they can’t figure out your app in the first two minutes, they’ll flag it. An empty screen with no guidance is a fast way to earn that flag.
Manual vs Automated App Testing
Manual Testing | Automated Testing |
|---|---|
Human interaction | Scripted execution |
Better for UX | Better for regression |
Slower | Faster |
Good for early-stage apps | Good for mature apps |
Lower setup | Higher setup |
Most solo developers should begin with manual testing and gradually automate repetitive regression tests as the app grows.
Performance Testing
Industry benchmarks now demand a crash-free rate above 99% and load times under two seconds. Apple’s reviewers are even stricter.
☐ App loads in under 3 seconds on target devices
☐ Smooth scrolling at 60fps (no dropped frames in lists or animations)
☐ Crash-free rate of 99.9% or higher before submission
☐ No excessive battery drain during normal use
☐ No memory leaks during extended sessions
☐ CPU usage stays within reasonable bounds during background operations
Xcode’s Instruments tool lets you monitor CPU usage, memory allocation, disk activity, and network activity in real time. If you’re not using it before submission, you’re guessing.
UI and UX Testing
Apple takes design seriously. Adherence to the Human Interface Guidelines isn’t optional if you want smooth reviews.
☐ Text is fully visible and doesn’t clip or overlap on any supported screen size
☐ Popups and alerts appear correctly and at the right moment
☐ Navigation through menus is seamless; swipe gestures work as expected
☐ Fonts, spacing, and colors are consistent across all screens
☐ Dark mode and light mode both render correctly
☐ Keyboard doesn’t obscure input fields
☐ Animations feel responsive, not sluggish or jarring
Network and Connectivity Testing
One of the most frequently missed categories. Practitioners on forums and LinkedIn consistently report that testing only on fast Wi-Fi is a recipe for post-launch surprises.
☐ Test on 2G, 3G, 4G, 5G, and Wi-Fi to detect load failures or timeouts
☐ Verify app behavior during mid-session network drops
☐ Confirm graceful reconnection after connectivity is restored
☐ Test offline mode: what happens when there’s no connection at all?
☐ Verify that large asset downloads (images, video) handle slow connections without crashing
As one testing team discovered, the root cause of their launch failures wasn’t faulty design. It was the absence of real-world network scenarios. They’d only tested on high-speed Wi-Fi and missed critical performance gaps under variable conditions.
Security Testing
Data protection isn’t a nice-to-have. It’s a non-negotiable part of any mobile app QA checklist, and Apple will reject apps that handle user data carelessly.
☐ Data encrypted in transit (HTTPS everywhere) and at rest
☐ Secure authentication flows (Sign in with Apple is required if you offer third-party social logins)
☐ No sensitive data stored in plaintext on the device
☐ Session tokens expire and refresh properly
☐ Test for common vulnerabilities: SQL injection, insecure API endpoints, improper certificate validation
Compatibility Testing
You can’t just test on your own phone and call it done.
☐ Test on at least 3 different iPhone models (varying screen sizes)
☐ Test on both iOS 18 and iOS 17 (as of 2026, 88% of users have updated to iOS 18, but the rest haven’t)
☐ Test on physical devices, not just the Xcode Simulator
☐ Verify orientation handling if your app supports landscape
Testing on actual devices is essential. Simulators miss issues that only appear in real-world conditions, like broken flows under network throttling or touch responsiveness differences between hardware models.
Accessibility Testing
Accessibility is a legal mandate in many jurisdictions and a quality signal Apple values.
☐ All interactive elements have correct VoiceOver labels and hints
☐ Color contrast meets WCAG standards
☐ Dynamic Type (font scaling) works without breaking layouts
☐ No functionality relies solely on color to convey meaning
☐ Touch targets are large enough for users with motor impairments
QA Category | Purpose | Prevents |
|---|---|---|
Functional Testing | Verify every feature works | Broken workflows |
UI & UX Testing | Ensure usability | Poor reviews |
Performance Testing | Measure speed and stability | Crashes |
Security Testing | Protect user data | Privacy violations |
Network Testing | Test weak/offline connections | Runtime failures |
Compatibility Testing | Test multiple devices | Layout bugs |
Accessibility Testing | Support all users | WCAG violations |
App Store Compliance | Meet Apple policies | Rejections |
Pre-Submission QA Timeline
Many developers leave QA until the day they submit their app. A better approach is to spread testing across the development lifecycle.
Development Stage | QA Focus |
|---|---|
Planning | Review requirements and acceptance criteria |
During Development | Unit testing and feature validation |
Feature Complete | Integration testing |
Beta Testing | TestFlight feedback |
Before Submission | Full QA checklist |
After Approval | Monitor crashes and analytics |
App Store QA Requirements for iOS in 2026
This is where many generic “mobile app testing checklist” articles fall short. Apple’s requirements change every year, and 2026 has brought several new hard stops.
Xcode 26 SDK Requirement
As of April 28, 2026, apps uploaded to App Store Connect must be built with the iOS 26 SDK. If your build environment is outdated, your submission will be rejected before a human even looks at it.
Privacy Manifests (PrivacyInfo.xcprivacy)
Since 2024, Apple has mandated privacy manifests and signatures for any third-party SDK that accesses sensitive APIs. As of 2026, this requirement is firmly established. Every bundled SDK needs its own PrivacyInfo.xcprivacy file declaring what it accesses and why. A submission without proper privacy manifests will be rejected.
AI Transparency and Consent
Apple now enforces updated AI transparency guidelines. If your app shares personal data with third-party AI services, you must clearly disclose this to users and secure explicit consent before proceeding. This is new as of November 2025 and catches many builders off guard.
Updated Age Ratings
Apple introduced new age rating tiers: 13+, 16+, and 18+. Developers must complete the updated age rating questionnaire to avoid submission delays. If your app was submitted before January 2026 without the updated ratings, it may need resubmission.
Subscription Pricing Transparency
Users must see full pricing details before they pay, including subscription costs, renewal terms, and cancellation instructions. Apple rejects apps that bury this information or make it ambiguous.
TestFlight Beta Testing
Use TestFlight for beta distribution. You can invite up to 10,000 external testers. Best practices suggest aiming for 100 to 300 beta testers, enough to surface real issues without overwhelming your ability to respond.
Review Timeline Expectations
Most updates are approved within 24 hours. First-time submissions typically take 2 to 4 business days. If flagged for permissions or content issues, expect 7 to 14 days. Plan accordingly.
For a deeper walkthrough of Apple’s review process, including how to handle rejections, see the guide to navigating Apple’s App Review.
Most Common App Store Rejection Reasons
Although every app is different, Apple's published data shows several recurring rejection categories.
Rejection Reason | Prevented By |
|---|---|
App crashes | Performance QA |
Missing privacy declarations | Privacy review |
Broken login | Functional testing |
Incorrect metadata | Metadata review |
Poor user experience | UI testing |
Payment issues | Subscription testing |
Guideline violations | Compliance review |
Missing reviewer credentials | Submission checklist |
QA Pitfalls to Avoid
First-time builders make the same mistakes over and over. Practitioners on Reddit, LinkedIn, and YouTube consistently flag these:
Testing only on simulators. The Xcode Simulator is useful for layout checks, but it cannot replicate real-world network variability, touch responsiveness, battery behavior, or camera performance. Always test on at least one physical device.
Forgetting to provide a demo account. If your app requires login, Apple’s reviewer needs working credentials. Include a demo username and password in the “Notes for Review” field in App Store Connect. One LinkedIn author who shared their submission checklist called this the single most common reason for first-submission rejection.
Ignoring empty states. When a reviewer opens your app for the first time, there’s no data. If the first screen is blank with no guidance, they won’t spend time figuring it out. Build onboarding states that show what the app does.
Metadata mismatch. Your App Store screenshots must match the current build. If your UI changed since you captured screenshots, update them. Apple checks for this.
Backend going down during review. A rejected app is often a backend story: unstable APIs, missing reviewer credentials, undisclosed data flows. Make sure your server stays up during the review window.
Missing privacy declarations in third-party SDKs. You’re responsible for every SDK bundled in your app. If one of them accesses a sensitive API without a corresponding privacy manifest entry, your submission gets rejected.
Treating QA as a final step. The biggest mistake of all. QA isn’t something you bolt on at the end. If you’ve been building for weeks without testing along the way, the final QA pass will surface so many issues that you’ll wish you’d started earlier.
If you’re a non-technical founder looking for tools that reduce these risks by design, the guide to choosing an app builder covers what to look for.
Does an AI-Built App Still Need QA?
Yes. Always. No exceptions.
This is the question many first-time builders get wrong in 2026. Whether you wrote every line of Swift by hand or an AI generated it, Apple’s review process is identical. The App Store doesn’t have a separate lane for AI-built apps. Every check on this QA checklist applies regardless of how the code was produced.
That said, AI-built apps do have specific areas that deserve extra scrutiny:
State management coherence. One-shot AI generators (tools that try to build an entire app from a single prompt) often produce inconsistent state handling across screens. Data might not persist correctly after an app restart. QA must verify that user data, preferences, and session state survive backgrounding and relaunching.
Subscription and paywall compliance. AI-generated paywall flows need careful review against Apple’s guideline 3.1.2. Pricing transparency, restore purchase buttons, and cancellation instructions are all common failure points.
Generated copy accuracy. AI sometimes produces placeholder text or slightly wrong descriptions. Review every string in the app, especially legal and privacy-related copy.
Privacy declarations. AI-built apps still need proper PrivacyInfo.xcprivacy files and accurate data usage declarations. The AI doesn’t always know what SDKs it’s bundling or what APIs they touch.
The difference between AI builder types matters here. One-shot generators tend to create more QA work because architectural decisions aren’t made deliberately. Structured, stepwise builders that sequence the work (plan the screens, then design, then build, then launch) produce more coherent output because QA-prone decisions are addressed during the build rather than discovered after it. The comparison of different AI builder approaches explains this distinction in detail.
Explore how x1’s studios handle this workflow, from planning through App Store submission, in a single tool.
Tools That Help You QA an iOS App
You don’t need an enterprise testing suite. For a solo builder or small team, these tools cover the essentials:
Xcode Instruments is the built-in performance profiling tool. It monitors CPU, memory, disk, network, and energy usage in real time. Free, already installed with Xcode, and the most important QA tool you’re probably not using.
TestFlight handles beta distribution. Install your app on testers’ devices without going through the App Store. Track crash reports and feedback directly from beta users.
Firebase Crashlytics (or Sentry) provides real-time crash monitoring. Integrate one of these before your beta testing phase so you can catch and diagnose crashes as they happen, not after users complain.
Xcode Simulator plus real devices. Use the simulator for rapid layout iteration. Use real devices for final validation of performance, network behavior, and hardware-specific features like the camera or haptics.
App Store Connect is where you manage metadata, screenshots, reviewer notes, and submission status. Double-check everything here before clicking submit: your app description, keywords, screenshots, privacy URL, and support URL.
Putting It All Together
An app QA checklist isn’t a formality. For solo builders and first-time founders, it’s the difference between a same-week approval and weeks of frustrating back-and-forth with Apple’s review team.
The pattern that works: build with structure so QA problems are smaller and fewer when you reach them. Plan your screens. Design before you build. Test as you go, not only at the end. Then run through your checklist methodically before submission.
If you want to see how a structured, stepwise workflow reduces QA overhead from the start, explore x1’s pricing and plans to find the right fit for your project.
Frequently Asked Questions
How long does it take to complete a full app QA checklist?
For a simple app with 5 to 10 screens, a thorough QA pass takes 1 to 3 days. Complex apps with payments, user accounts, and dynamic content can take a week or more. The key variable is how many issues you surface. If you’ve been testing throughout the build process, the final pass goes much faster.
Can I skip QA if my app is very simple?
No. Even a single-screen app needs to pass Apple’s review guidelines, display correctly across screen sizes, handle network interruptions gracefully, and include proper privacy declarations. Simple apps have fewer things to test, but skipping the process entirely risks rejection for basic compliance issues.
What’s the difference between an app QA checklist and Apple’s App Review Guidelines?
Apple’s guidelines are the rules your app must follow. A QA checklist is your tool for verifying that it actually does. The guidelines tell you “apps must not crash.” Your checklist includes the specific steps to confirm yours doesn’t, like testing on multiple devices, profiling memory usage, and running through all user flows.
Do I need to test on every iPhone model?
No, but you need to cover the range. Test on at least one small screen (iPhone SE or iPhone 13 mini), one standard size (iPhone 15 or 16), and one larger model (iPhone 15 Plus or Pro Max). This catches most layout and rendering issues.
How often should I update my QA checklist?
At minimum, update it whenever Apple releases new guidelines or SDK requirements. In 2026, that means incorporating the Xcode 26 SDK mandate, updated privacy manifests, AI consent rules, and new age rating categories. Beyond Apple’s changes, update the checklist whenever your app adds a major feature.
Is manual testing enough, or do I need automated tests?
For a first release with limited scope, manual testing guided by a thorough checklist is usually sufficient. As your app grows and you ship updates more frequently, automated UI tests and unit tests become increasingly valuable. Start manual, automate the repetitive parts over time.
What happens if Apple rejects my app?
You’ll receive a resolution center message in App Store Connect explaining the specific guideline violation. Fix the issue, update your build or metadata, and resubmit. Most rejections for first-time apps are resolved in one resubmission cycle if you address the feedback completely. Partial fixes lead to additional rounds.
Does using an AI app builder change what I need to test?
The testing categories stay the same, but the risk areas shift. AI-generated code may have inconsistencies in state management, placeholder text that wasn’t caught, or subscription flows that don’t fully comply with Apple’s rules. The QA checklist still applies in full. The tool you built with doesn’t change what Apple expects.